Address
No. 3F07, Tao Cube, No.68, CCIH, Jihua West Road,Chancheng District, Foshan City, Guangdong, China.

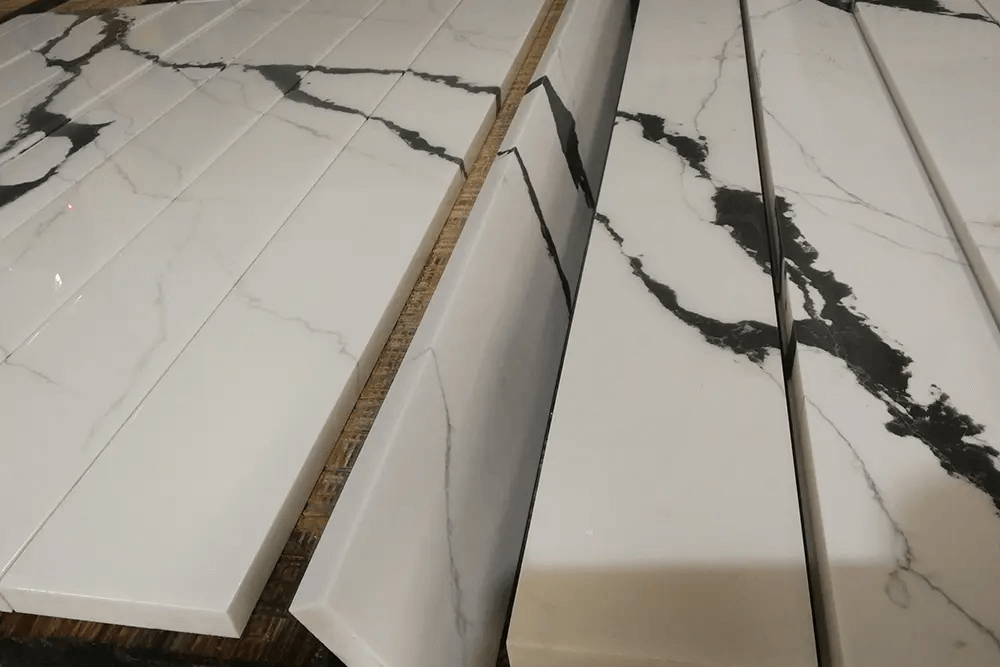
curtain wall tile installation | Contigo Ceramics

You’ve selected high-quality porcelain tiles for your shower walls, but now you face the challenge of installing a curtain rod without cracking the tile. The curtain wall tile installation process isn’t just about the tile itself—it’s about the precise preparation, mortar choice, and drilling technique that ensures the rod stays secure and the tile remains intact. Many contractors skip these steps and end up with broken tiles or a loose rod after six months.
A curtain wall in a residential bathroom is typically a three-wall enclosure where a shower curtain hangs. Installing tile on these walls requires a waterproof substrate, polymer-modified thin-set, and proper joint spacing. Once the tile is set, you must drill into it for the curtain rod brackets. Without diamond-tipped bits and a water-cooling method, even premium porcelain will crack under the pressure.
At Contigo Ceramics, a Foshan-based factory with over a decade of export experience, we produce rectified porcelain tiles that meet ANSI A137.1 standards. Our tiles are fired at 1200–1250°C, yielding a Mohs hardness of 7–8—ideal for wet areas. In this guide, we cover the complete curtain wall tile installation workflow: from tile selection and mortar application to drilling the rod holes, supported by real factory specs and trade data.
Who This Guide Is For
- Contractors and DIYers installing shower wall tile and a curtain rod for the first time
- Interior designers specifying tile for bathroom renovations where a shower curtain is used
- Importers and builders looking for factory-direct porcelain tile suited for wet areas (DCOF ≥0.42)
Key Takeaways
- Use polymer-modified thin-set with 95%+ back-butter coverage for shower curtain walls.
- Diamond-tipped drill bits + water cooling prevent porcelain tile cracking during rod installation.
- Minimum 2mm grout joint for rectified tile; 3–5mm for non‑rectified to accommodate expansion.
- Leveling clips eliminate lippage that causes curtain rod brackets to sit unevenly.
- Porcelain tile absorbs <0.5% moisture—no sealer needed for shower applications.
What Is Curtain Wall Tile Installation?
Curtain wall tile installation refers to the process of setting ceramic or porcelain tiles on the three vertical surfaces of a shower curtain enclosure—typically the back wall and two side walls. The goal is to create a waterproof, easy-to-clean surface that supports a curtain rod and withstands daily moisture. Unlike full glass enclosures, a curtain wall requires lower tile edges to be flush with the tub or shower base to prevent water pooling.
Key components include: substrate preparation (cement board or waterproof membrane), mortar selection, tile placement with leveling clips, and post‑installation drilling for hardware. The industry standard for wet‑area tile is ANSI A137.1, which specifies water absorption <0.5% (porcelain) and slip resistance DCOF ≥0.42. Contigo Ceramics produces outdoor‑grade porcelain that exceeds these thresholds, making it a reliable choice for curtain walls.
Why Tile Selection Matters for Curtain Walls
Not all tiles perform equally in shower environments. Large-format tiles (e.g., 600×600 mm or 600×1200 mm) reduce grout lines, minimizing mold growth. Rectified tiles allow a tight 2 mm grout joint, while non‑rectified tiles require 3–5 mm. For curtain walls, we recommend matte or lightly textured porcelain with PEI 4 rating—durable enough for walls but not slippery when wet.
At our Foshan factory, we press tiles with a 7800T hydraulic press, achieving consistent thickness within ±0.3 mm. This precision is critical for curtain walls because uneven tiles create gaps where the curtain rod bracket doesn't sit flush, causing stress points that can crack the tile during drilling.
| Parameter | Recommended Value | Why It Matters |
|---|---|---|
| Water Absorption | <0.5% (Group BIa) | Prevents moisture damage behind tile |
| DCOF | ≥0.42 (wet) | Safety if water splashes onto tile floor |
| Rectification | Mechanically rectified (±0.3 mm) | Enables tight grout joint, easy rod bracket alignment |
| PEI Rating | 4 (commercial light) | Scratch‑resistant, easy to drill |
| Tile Size | ≥600×600 mm | Fewer grout lines = less maintenance |
Step‑by‑Step Curtain Wall Tile Installation
1. Substrate and Waterproofing
Apply a cement‑board backer unit or a waterproof membrane (e.g., liquid‑applied or sheet) over the wall studs. All joints must be taped and sealed. This prevents moisture from reaching the framing. According to TCNA Handbook methods B422, a waterproofing layer is mandatory for shower curtain walls.
2. Mixing and Applying Thin‑Set Mortar
Use a polymer‑modified thin‑set mortar mixed to a peanut‑butter consistency. Trowel notches: ½″ × ½″ for tiles up to 300 mm, ¾″ × ¾″ for larger formats. Back‑butter each tile—this ensures 95% + coverage. Air pockets under tiles cause cracking when you later drill for the curtain rod.
“For tiles larger than 600 mm on any side, back‑buttering is mandatory to achieve the 95% coverage required by ANSI A108.5.” — TCNA Handbook
3. Setting Tiles with Leveling Clips
Place leveling clips every 300 mm along each edge. They hold adjacent tiles at the same height, eliminating lippage. Without clips, even a 0.5 mm height difference will be noticeable when you walk past the curtain—and your rod brackets will sit unevenly. Insert spacers for 2 mm grout joints.
4. Grouting
Use a sanded epoxy or cementitious grout specifically for low‑absorption porcelain. Wipe off haze within 24 hours using a grout‑haze remover—don’t use vinegar on porcelain.
How to Install a Shower Curtain Rod into Tile (Without Cracking)
This is the most common failure point in curtain wall tile installation. A loose rod or cracked tile results from using the wrong drill bit or technique. Follow these steps:
- Mark bracket positions — use a level and pencil. Ensure the rod will be at least 1800 mm above the tub floor.
- Use a diamond‑tipped hole saw — never use masonry bits on porcelain. They overheat and shatter the tile in seconds.
- Keep the bit wet — spray water continuously or use a sponge. Water cooling prevents thermal shock.
- Start at a 45° angle — this prevents the bit from wandering on the glazed surface. Once a small groove is cut, straighten the drill to 90°.
- Do not hammer — apply steady, moderate pressure. Let the diamond do the cutting.
- Insert wall anchors — plastic expansion anchors rated for at least 50 lbs. Screw brackets firmly but avoid overtightening.
Key Fact: A 10 mm diamond core bit can drill through 9 mm porcelain tile in under 30 seconds when water‑cooled. Without water, the same bit takes 2 minutes and risks cracking.
Common Mistakes in Curtain Wall Tile Installation
- Skipping waterproofing — leads to mold and substrate rot within 12 months.
- Using standard wall anchors — plastic anchors alone don’t hold in tile; use toggle bolts or molly bolts for hollow walls.
- Drilling too close to tile edges — keep holes at least 15 mm from any edge or corner to avoid stress fractures.
- Not back‑buttering — voids under tile cause it to flex and crack when drilling.
Frequently Asked Questions
What type of tile is best for a curtain wall installation?
Rectified porcelain tile with water absorption <0.5% and PEI 4 is best. It resists moisture, drills cleanly, and supports a curtain rod without cracking.
Can I install a curtain rod on ceramic tile instead of porcelain?
Yes, but ceramic is softer and more porous. Drilling is easier, but the tile may chip more easily. Porcelain is stronger and preferred for long‑term durability.
How do I prevent tile cracking when drilling for the curtain rod?
Use a diamond‑tipped drill bit, keep the bit wet, start at a 45° angle, and avoid drilling near edges. Overtightening screws also causes cracks.
What size grout joint should I use for curtain wall tile?
For rectified tile, a 2 mm joint is sufficient. For non‑rectified tile, use 3–5 mm to account for slight size variations.
Should I seal porcelain tile on a curtain wall?
No. Porcelain is non‑porous and does not require sealing. Only the grout joints may need a penetrating sealer if you choose cementitious grout.
Continue Your Sourcing Journey
- Complete Guide to Sourcing from China — learn how to verify factory quality and negotiate FOB pricing for tiles.
- Large Format Technical Guide — technical specs for 600×1200 mm and larger tiles used in shower walls.
- Matte Porcelain Tiles Product Page — browse our factory‑direct matte tile options for bathroom curtain walls.
External Reference: ANSI A108 tile installation standards
Conclusion
Successful curtain wall tile installation combines proper tile selection, careful mortar work, and precise drilling for the curtain rod. At Contigo Ceramics, we produce rectified porcelain tiles with tight tolerances and high density, making them ideal for shower applications. Follow the steps in this guide to avoid cracked tiles and loose rods. For bulk orders or container pricing, contact our team for a quote.
Written by the Contigo Ceramics technical team, Foshan, China.