Address
No. 3F07, Tao Cube, No.68, CCIH, Jihua West Road,Chancheng District, Foshan City, Guangdong, China.

Porcelain Tile Installation Guide: Step by Step | Contigo Ceramics
Embarking on a porcelain tile installation project is a significant investment, whether you’re outfitting a luxury hotel lobby, a contemporary residential space, or a heavy-traffic commercial area. Access to a comprehensive porcelain tile installation guide can make the difference between a flawless, long-lasting surface and costly repairs down the line. For buyers sourcing directly from the factory, understanding the nuances of installation is even more critical, as you bypass traditional retail channels and take full control of quality and logistics. At Contigo Ceramics, we supply architects, contractors, and importers worldwide with premium large-format porcelain slabs, 20mm outdoor pavers, and intricate mosaics—all backed by the expertise you need for a successful installation.
Why a Factory Direct Porcelain Tile Installation Guide Matters
Most generic guides assume tiles come from local distributors with standard specifications. A factory direct porcelain tile installation guide addresses the unique considerations of handling materials straight from the production line. When you buy directly from a manufacturer like Contigo Ceramics, you receive tiles in bulk, often with thinner tolerances, advanced rectified edges, and specific surface treatments tailored to global markets. This requires an installation approach that accounts for batch variations, international shipping acclimatization, and the manufacturer’s recommended adhesives. A guide tailored to factory direct procurement empowers you to avoid delays and ensure the product’s performance is fully realized.
Our clients often ask how to install porcelain tile factory direct to leverage the cost savings without compromising on finish quality. The answer lies in detailed pre-installation checks, understanding the technical data sheets provided with every shipment, and working with installers who are briefed on the material’s origin. Our factory direct porcelain tiles are engineered for consistency, but proper handling from port to job site is the first step any reliable guide will cover.
Pre-Installation Essentials for Direct Buyers
Inspecting Your Shipment and Acclimatizing Tiles
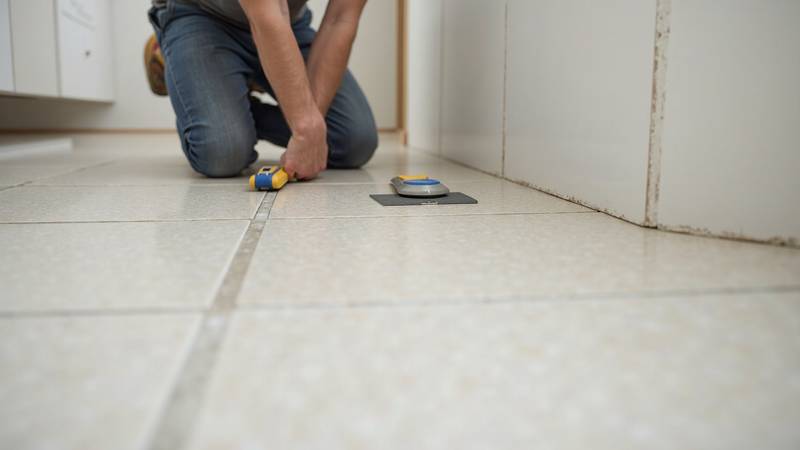
When you unload a container of porcelain tiles purchased directly from our factory, the first step is a thorough batch inspection. Even with rigorous quality control, shipping can cause micro-fractures or edge chipping. Spread tiles from multiple pallets to verify color calibration and size consistency—especially critical with large-format slabs. Next, allow tiles to acclimatize to the installation environment for at least 48 hours. This simple step, often highlighted in any professional porcelain tile installation guide, prevents thermal shock and adhesive failure caused by sudden temperature shifts.
Surface Preparation and Subfloor Requirements
The longevity of a porcelain floor depends almost entirely on the substrate. Whether you are laying 20mm outdoor pavers on pedestals or installing polished tiles over radiant heating, the subfloor must be flat, clean, and structurally sound. For factory direct porcelain tile installation, we recommend a maximum deviation of 3mm over a 2-meter straightedge. Use self-leveling compounds to correct imperfections. A crack-isolation membrane is non-negotiable for concrete slabs, especially in regions with freeze-thaw cycles. This is one area where cutting corners will void any factory warranty and result in callbacks.
Industry data shows that over 65% of porcelain tile failures are traced back to inadequate subfloor preparation rather than tile defects. Spending an extra day on leveling saves thousands in long-term maintenance.
Selecting the Right Adhesive and Grout
Choosing the correct adhesive is just as important as the tile itself. For large-format porcelain slabs (1600x3200mm and larger), we exclusively specify high-performance polymer-modified thin-set mortars. These adhesives provide the flexibility needed to absorb minor substrate movements without transferring stress to the tile. A porcelain tile installation guide worth its salt will always differentiate between large-format and standard tile mortars. For outdoor factory direct porcelain tiles, ensure the adhesive is rated for exterior use and extreme temperatures. Grout selection follows the same logic: epoxy grouts are preferred for their stain resistance and compressive strength, particularly in commercial kitchens and factories.
If you plan to buy porcelain tile installation guide wholesale—meaning you’re an importer or distributor who will pass this knowledge to your own clients—we can provide digital and printed versions co-branded with your company. This adds value to your offering and reduces installation mistakes across your sales network. Contact our team to discuss bulk support materials.
Step-by-Step: How to Achieve a Flawless Installation
This section of our porcelain tile installation guide walks you through the core process. While every site is unique, these steps form the backbone of a successful install for direct buyers. Always cross-reference the technical specifications of the specific product line you purchased. Our tiles category page lists full documentation for each series.
1. Layout Planning and Dry Fitting
Begin by snapping chalk lines to find the room’s geometric center. Dry-lay a mix of tiles from different boxes along both axes. This not only confirms the pattern but helps you spot any slight shade variation before mortar touches the back of the tile. For rectified porcelain, a 1.5mm grout joint is standard, though some minimal installations push to 0.5mm with specialized leveling systems. The layout step is where the best porcelain tile installation for direct buyers distinguishes itself—because you have full control over batching, you can mix tiles evenly and avoid noticeable banding.
2. Applying the Mortar and Setting Tiles
Use a notched trowel sized according to the tile dimension; a 10x20mm half-moon notch is common for large-format porcelain. Back-butter each tile with a thin contact layer to ensure 100% coverage, a must for outdoor tiles subjected to thermal cycling. Press the tile firmly into the mortar bed and slide it perpendicular to the trowel ridges to collapse them, eliminating air pockets. Immediately insert leveling clips and wedges to achieve a lippage-free surface. This method, detailed in every technical porcelain tile installation guide, is non-optional when installing polished, high-sheen surfaces where any unevenness will catch light.
3. Cutting and Edge Finishing
Porcelain is denser than ceramic and requires diamond wet saws for clean cuts. For complex cuts around columns or electrical outlets, a variable-speed grinder with a continuous rim diamond blade is indispensable. Because factory direct porcelain tiles often have full-body color through the biscuit, minor edge chipping is less visible—yet still, polishing pads should be used to soften cut edges before grouting. When you buy porcelain tile installation guide wholesale from us, our technical sheets include recommended blade specifications and RPMs for the best results.
Understanding Porcelain Tile Installation Cost from Factory
One of the main motivations for bypassing middlemen is the significant reduction in material cost. However, a full porcelain tile installation cost from factory should be assessed holistically. While you might pay 30-50% less per square meter for the tile itself, you must factor in logistics, import duties, and the possibility of needing to adjust the installation method to match the tile’s origin specifications. The true financial advantage emerges when you combine high-volume procurement with a skilled installation team that follows a precision-oriented porcelain tile installation guide. Labor remains the most expensive line item, and a flawless install that avoids rework is where factory direct buyers maximize ROI.
To optimize your budget, request a detailed quotation from our logistics partners and line it up with your project timeline. We often advise clients to order 10-15% overage for cuts and future repairs—a figure you’ll find recommended in any credible porcelain tile installation guide. This is especially pertinent when you are importing unique large-format designs that may not be readily available for a small re-order. Learn more about our global shipping capabilities and how we help you control landed costs.
“The biggest cost driver in porcelain tiles is not the product itself but the labor. An installer who understands factory direct materials works faster and with fewer callbacks. That’s pure profit for the developer.” — Santiago R., International Construction Consultant
Special Considerations for Outdoor and 20mm Porcelain Pavers
Outdoor installations using our 20mm thick porcelain pavers follow a slightly different set of rules. Many of these systems are installed on pedestals over waterproofing membranes, allowing for a floating floor with no adhesive. The factory direct porcelain tile installation guide for these products emphasizes proper pedestal layout, perimeter edge restraints, and wind uplift calculations for rooftop applications. If you do choose to mortar-set 20mm pavers onto a concrete slab, a drainage mat is essential to prevent water from pooling beneath the tiles, which can cause efflorescence and long-term deterioration.
How to install porcelain tile factory direct around swimming pools and wet areas also demands an anti-slip finish and epoxy grout for chemical resistance. When sourcing tiles directly from Contigo Ceramics, you can specify the exact coefficient of friction required for your project, ensuring compliance with local safety codes from the outset. This is a detail often overlooked by resellers but central to our production planning.
Common Pitfalls and How to Avoid Them
Even seasoned professionals can fall into traps when working with high-end porcelain. Below are frequent missteps identified in our after-sales support calls, resolved through a consistent porcelain tile installation guide protocol:
- Neglecting expansion joints: Porcelain expands and contracts. Every perimeter and every 6-8 meters in a continuous run needs a flexible joint, not rigid grout.
- Using insufficient mortar coverage: For large-format tiles, spot-bonding is unacceptable. Back-buttering and collapsing ridges is the only way to achieve the 80% minimum coverage required for exterior applications.
- Mixing batches improperly: Tiles from different production runs (calibers) can have slight size differences. Always check the shade and caliber codes on the boxes and mix from 3-4 cartons simultaneously.
- Sealing before grouting: Some polished porcelain can micro-absorb pigments from dark grouts. A pre-grout sealer or grout release is cheap insurance against staining.
Our commitment to supporting direct buyers extends beyond the sale. We regularly update our technical blog with installation case studies and tips. If you’re searching for the best porcelain tile installation for direct buyers, it’s one backed by manufacturer expertise and responsive after-sales care. Explore our installation blog posts for the latest advice.
Why Choose Contigo Ceramics as Your Direct-Purchase Partner
Our factory-direct model is built on transparency and technical precision. Unlike distributors who may have only surface-level knowledge of the manufacturing process, our team can advise you on everything from body composition and glaze hardness to the optimal trowel notch for a specific relief pattern. Every shipment from our plant can be accompanied by a tailored porcelain tile installation guide, printed in your language, that aligns with your local building practices. This level of support is what transforms a simple tile purchase into a long-term partnership.
When you decide to buy porcelain tile installation guide wholesale from us, you’re equipping your sales team and installers with a tool that reduces errors and elevates the final finish. For architects and specifiers, having a factory-endorsed installation protocol simplifies the approval process and provides a clear quality benchmark. Reach out today to discuss your upcoming project and request a sample of our documentation.
Conclusion
Mastering a reliable porcelain tile installation guide is the final, crucial link in the supply chain that connects our factory floor to your finished space. By following the steps outlined—from acclimatization and substrate prep to adhesive selection and outdoor pedestal systems—you protect your investment and guarantee a finished surface that stands the test of time. Direct procurement offers unparalleled value, but only when paired with installation knowledge that respects the material’s properties. Let Contigo Ceramics be more than your tile supplier; let us be your technical resource for every installation challenge. Start browsing our extensive tile collection and secure the quality your project demands, backed by a factory direct porcelain tile installation guide you can trust.